
What Is the tee Command in Linux?
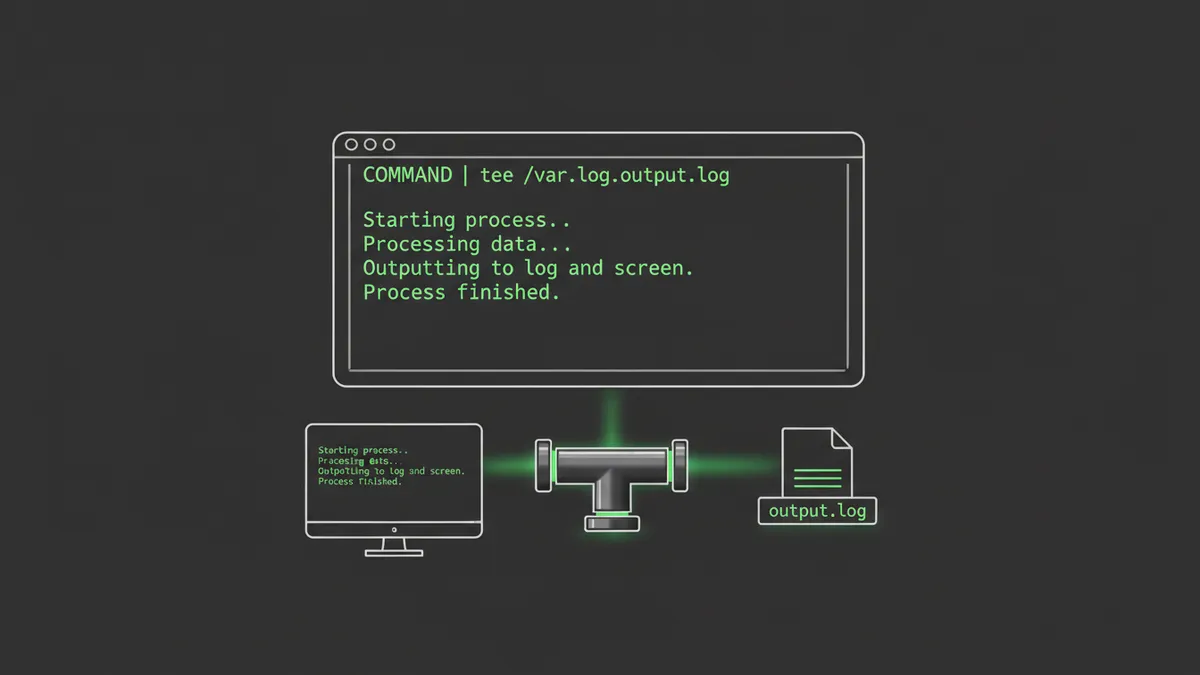
If you’ve ever run a command and wished you could watch the output scroll by and save it to a file at the same time, you need the tee command in Linux. It reads from standard input and writes to both the terminal and one or more files simultaneously. Think of it as a fork in your data stream. You see everything live while a clean copy gets saved to disk.
The tee command is part of GNU coreutils. That means it’s already installed on every major Linux distro. No packages to grab, no dependencies to chase. It just works.
Unlike the cat command which reads files, tee writes to files while passing data through your pipeline. And unlike basic output redirection, tee doesn’t force you to choose between seeing output and saving it. You get both.
Why It’s Named After a Pipe Fitting
The name “tee” comes from the T-shaped plumbing joint that splits water flow in two directions. Data flows in through one end, then splits: one copy goes to your terminal, the other goes to a file. The analogy is perfect. It’s the same concept behind Unix pipelines in general, where small tools connect together to handle text streams.

Get a VPS from as low as $19.95/year! WOW!
The tee command history and Unix origins go back to Unix Version 5 in 1974. Over 50 years of proven reliability. That’s the kind of track record I love about core Unix tools.
When You Need tee Instead of Just Redirecting
You already know how to redirect output in Linux with > and >>. So why bother with tee?
Simple: redirection is invisible. When you run command > output.txt, the terminal goes silent. You have no idea if the command is still running, throwing errors, or finished. With tee, you watch it happen in real time while the file fills up in the background. For long deployments, installs, or debug sessions, that visibility is everything.
Basic tee Syntax and How to Read It
Syntax Breakdown
command | tee [OPTIONS] FILE…
That’s it. Pipe any command’s output into tee, give it a filename, and it handles the rest. You can pass multiple filenames to write the same output to several files at once. Check the official tee man page for every option, but honestly, you’ll use about three of them 99% of the time.
Your First tee Example
ls -la | tee directory_listing.txtThis lists your current directory in long format, prints it to your screen, and saves an identical copy to directory_listing.txt. Without any options, tee overwrites the file each time you run it. Keep that in mind.
I remember the first time I used tee. I was trying to capture the output of a massive find command that was searching through thousands of files on a server at my old sysadmin job. I’d been running the command, copying terminal output manually, and pasting it into a text file. When a coworker showed me find / -name "*.conf" | tee configs.txt, I felt genuinely embarrassed I hadn’t known about it sooner. Live and learn.
Core tee Options You’ll Actually Use
Append to File with -a (Don’t Overwrite)
By default, tee clobbers your file on every run. For log files, that’s a disaster. The -a flag tells tee to append instead:
echo "Deploy started at $(date)" | tee -a deploy.logThis is critical for any kind of logging. I use tee -a in virtually every script that touches a log file. Without it, you’ll overwrite yesterday’s logs and lose the exact data you needed during a post-mortem.
Write to Multiple Files at Once
command | tee file1.txt file2.txt backup.txtTee accepts unlimited file arguments. Every file gets an identical copy of the output. I use this when I want a local log and a shared network log at the same time. One command, multiple destinations, zero hassle.
Ignore Interrupts with -i
The -i flag tells tee to ignore interrupt signals (like Ctrl+C). This matters when tee runs in a pipeline where another process might catch a signal:
long_running_command | tee -i -a output.logWithout -i, a stray Ctrl+C could kill tee mid-write and leave you with a truncated log file. In production scripts, I combine both flags: tee -a -i logfile.txt. Belt and suspenders.
The sudo tee Trick: Write to Root-Owned Files Without Opening a Root Shell
This is the section most tutorials rush through, and it’s arguably the most practically important use of tee. If you manage Linux systems, you’ll use this pattern constantly.
Why sudo echo Fails
Try this and watch it break:
sudo echo "net.ipv4.ip_forward=1" >> /etc/sysctl.conf
# Permission denied!
Wait, you used sudo. Why did it fail? Here’s the thing most people miss: sudo elevates the echo command, but the >> redirection is handled by your shell, which is still running as your regular user. Your unprivileged shell tries to open /etc/sysctl.conf for writing and gets rejected.
Understanding this requires knowing how the shell parses pipelines and redirections. The redirect happens before sudo even runs. It’s a common gotcha, and once you understand it, you’ll never make the mistake again.
The Correct Pattern with sudo tee
echo "net.ipv4.ip_forward=1" | sudo tee -a /etc/sysctl.confNow tee is the command that gets elevated privileges. Tee opens the file as root and writes to it. The echo command runs as your normal user, which is fine because echo doesn’t need any special permissions.
Security Benefit
This pattern is safer than sudo bash -c 'echo text >> /etc/file' because only the write operation (tee) gets root privileges. The command generating the data runs unprivileged. Principle of least privilege in action.
This works for any root-owned config file: /etc/hosts, /etc/fstab, Nginx configs, or your sudoers file. It’s one of those patterns that once you learn, you use weekly.
Append to a System Config File Safely
If you don’t need to see the output echoed back to your terminal, suppress it with /dev/null:
echo "192.168.1.50 myserver" | sudo tee -a /etc/hosts > /dev/nullThe > /dev/null at the end silences tee’s terminal output while still writing to the file. Clean and quiet.
Capture Both stdout and stderr with tee
Why tee Only Captures stdout by Default
Here’s a subtlety that trips people up: tee only sees stdout (file descriptor 1). Error messages flow through stderr (file descriptor 2), which bypasses tee entirely. So if a command throws errors, those errors show up on your screen but never make it into the log file.
Merge stderr into stdout Before Piping
The fix is straightforward. Redirect stderr into stdout before the pipe:
./deploy.sh 2>&1 | tee -a deploy.logThe 2>&1 merges both streams, so tee captures everything: normal output and error messages alike. I use this for every long-running process. Ansible playbooks, make commands, install scripts, you name it. If something fails at 3 AM, I want the full picture in my log file.
Real-World tee Use Cases Every Sysadmin Needs
Log a Long-Running Command While Watching It Live
./deploy.sh 2>&1 | tee -a deploy_$(date +%F).logDate-stamped log files keep things organized. You watch the deploy happen in real time, and tomorrow you can grep through the log if something went sideways. Once your log files start growing, set up logrotate to manage them automatically.
Capture Software Install Output for Debugging
sudo apt install nginx 2>&1 | tee ~/nginx_install.logI learned this lesson the hard way. Years ago, I installed a package that pulled in a dozen dependencies, one of which conflicted with something already on the system. The install “succeeded” with warnings I didn’t catch because the output scrolled past too fast. Spent hours debugging what turned out to be a version conflict that was printed right there in the install output. Now I tee every install.
Use tee Inside Shell Scripts
This is the power move most tutorials skip. Add this line to the top of any bash script to log everything automatically:
exec > >(tee -a script.log) 2>&1Every line of output from that point forward gets written to both the terminal and script.log. No need to pipe individual commands. The entire script is logged.
I put this in every backup script, every cron job, every maintenance script I write. I once had a cron job that ran nightly backups. It worked fine for months. Then one night it silently failed. No log, no alert, no evidence of what went wrong. I woke up to a broken backup with zero breadcrumbs. That’s when exec > >(tee -a ...) became the first line in every script I write for automatic backups on Linux.
Chain tee with grep, awk, or sed in a Pipeline
Tee shines in complex pipelines where you want to save raw data at one stage and process it further downstream:
journalctl -u nginx | tee raw.log | grep -i error | tee errors.logThis saves the full journal output to raw.log, filters for errors with the grep command, then saves just the errors to errors.log. You can extend this further with awk for field extraction, sed for transformations, or even xargs for bulk operations on captured filenames.
You can also combine tee with the tail command to monitor log files that tee is actively writing to. Run your process with tee in one terminal, then tail -f the log in another for a second view.
tee vs Output Redirection (>): When to Use Which
| Feature | Redirection (>) | tee |
|---|---|---|
| Shows output on screen | No | Yes |
| Saves to file | Yes | Yes |
| Multiple files | No (needs workaround) | Yes, natively |
| Works in pipelines | End of pipe only | Anywhere in pipe |
| sudo write to root files | Fails | Works perfectly |
Use > when you only need to save output and don’t care about watching it. Use tee when visibility matters, when you need multiple destinations, or when you’re working with sudo and root-owned files.
Quick tee Command Cheat Sheet
command | tee file.txt— Write stdout to file (overwrite) and terminalcommand | tee -a file.txt— Append to file instead of overwritingcommand | tee file1.txt file2.txt— Write to multiple files at onceecho 'text' | sudo tee /etc/file— Write to a root-owned fileecho 'text' | sudo tee -a /etc/file > /dev/null— Append silently to root filecommand 2>&1 | tee file.log— Capture stdout AND stderrcommand | tee file.txt | grep pattern— Save full output, filter to screenexec > >(tee -a script.log) 2>&1— Log entire script automatically
For the full list of options, see the GNU Coreutils tee documentation.
“Write programs that do one thing and do it well. Write programs to work together. Write programs to handle text streams, because that is a universal interface.” — Doug McIlroy, Bell Labs (inventor of Unix pipes)
The tee command lives by that philosophy. It does one thing: split a stream. And it does it perfectly.
Frequently Asked Questions
Can tee write to more than two files?
Yes. You can pass as many filenames as you want: command | tee file1.txt file2.txt file3.txt. Every file gets an identical copy of the output.
Does tee work with binary data?
Tee handles binary data fine. It copies bytes from stdin to stdout and files without modifying them. However, viewing binary output on your terminal will look like garbage, so redirect stdout to /dev/null if you only need the file copy.
How do I use tee with sudo without seeing the output?
Add > /dev/null at the end: echo "text" | sudo tee -a /etc/hosts > /dev/null. This suppresses the terminal echo while still writing to the file.
Start Using tee in Your Workflow
The tee command is one of those tools that feels minor until you realize you needed it in every script you ever wrote. Once it clicks, you’ll wonder how you managed without it. I’ve been using Linux for over 15 years, and tee is still one of the commands I reach for daily.
If you’re building up your command line toolkit, check out my guides on using systemctl for service management and setting up automatic backups on Linux where tee plays a starring role in logging. And if output redirection is still fuzzy, start with the fundamentals in my guide on how to redirect output in Linux.
The best way to learn tee? Open a terminal and try these examples right now. Start with ls | tee test.txt, then build up from there. You’ll have it down in five minutes.


