File ownership in Linux can trip up even experienced users. You’ve probably seen “operation not permitted” errors when trying to access perfectly legitimate files. Or maybe you’ve transferred files between systems only to find they’re all owned by the wrong user.
The chown command is your solution. It changes who owns files and directories on your Linux system. I’ve used it countless times to fix web server permissions, correct ownership after file transfers, and set up team collaboration directories.
This guide shows you exactly how to use chown effectively. You’ll learn the syntax, see practical examples, and discover security best practices that prevent common mistakes.
What is the chown Command in Linux?
The chown command changes file ownership in Linux. It’s part of the GNU Coreutils project, which provides the fundamental file manipulation tools you use every day.
Every file and directory in Linux has two ownership attributes:

- Owner – The user who owns the file
- Group – The group that owns the file
These ownership settings work together with permissions to control who can read, write, or execute files. Think of ownership as who has potential access, while permissions define what they can actually do.
Understanding File Ownership vs File Permissions
Here’s where newcomers often get confused. Ownership and permissions are related but distinct concepts.
When you run ls -la, you see something like this:
-rw-r--r-- 1 alex developers 2048 Dec 3 10:30 project.txt
Let me break down what you’re seeing:
-rw-r--r--– These are the permissions (what actions are allowed)alex– This is the owner (who owns the file)developers– This is the group (which group owns it)
The Linux file permissions model defines three categories: owner, group, and others. The chown command controls the first two categories by changing ownership. For changing the actual permission bits, you’d use the chmod command instead.
In practice, you’ll often use both commands together. After setting up a web server directory, I typically run chown to set the ownership to the web server user, then chmod to restrict permissions appropriately.
Why chown Requires Root Privileges
You can’t just change any file’s ownership to anyone you want. That would be a massive security hole.
On Linux, only root can transfer file ownership. This is fundamental to the security model. If regular users could change ownership, they could hand off malicious files to system accounts or evade disk quotas.
You’ll typically run chown with sudo:
sudo chown alex:developers project.txt
The only exception is changing the group on files you already own – you can change a file’s group to any group you’re a member of without root privileges.
Basic chown Command Syntax and Usage
The chown man page defines the basic syntax, but let me show you how it works in real-world terms.
The Standard Format
Here’s the basic chown syntax:
chown [OPTIONS] USER[:GROUP] FILE
Let me translate that into something more concrete:
chown alex file.txt– Changes owner to alexchown alex:developers file.txt– Changes owner to alex, group to developerschown :developers file.txt– Changes only the group to developerschown -R alex /var/www/mysite– Recursively changes ownership of entire directory
Simple enough, right? The command name “chown” is short for “change owner” – one of those Unix abbreviations that makes sense once you know what it stands for.
Understanding User:Group Notation
That colon between the user and group is important. It tells chown you’re specifying both ownership attributes.
Here’s what each variation does:
chown user file– Changes owner only, group stays the samechown user: file– Changes owner, and sets group to user’s primary groupchown user:group file– Changes both owner and group explicitlychown :group file– Changes group only, owner stays the same
That user: syntax (with the trailing colon) is handy. It automatically sets the group to the user’s default group, which is usually what you want anyway.
Practical chown Examples You’ll Actually Use
Let me show you the scenarios I run into most often. These are the real-world use cases that every system administrator eventually encounters.
Changing Only the File Owner
Sometimes you just need to change who owns a file without touching the group.
sudo chown alex config.yaml
This changes the owner to alex but leaves the group unchanged. I use this when moving personal files between user accounts or when a developer leaves and we need to reassign their scripts to someone else.
Changing Only the Group
To change just the group ownership, put a colon before the group name:
sudo chown :developers project_files.tar.gz
This is useful for team collaboration. When you have multiple developers working on a project, putting all the files in a shared group gives everyone appropriate access without changing individual ownership.
Changing Both Owner and Group
Most commonly, you’ll change both at once:
sudo chown www-data:www-data /var/www/html/index.html
This is the bread-and-butter command for web server management. Apache and Nginx typically run as the www-data user, so your web files need this ownership for the server to read and modify them properly.
Another pattern I use constantly:
sudo chown alex:alex /home/alex/.bashrc
Or using the shorthand:
sudo chown alex: /home/alex/.bashrc
Both commands do the same thing – the trailing colon automatically sets the group to alex’s primary group.
Using Numeric User and Group IDs
Every user and group has a numeric ID. You can use these instead of names:
sudo chown 1000:1000 transferred_file.dat
Why would you do this? When transferring files between systems, usernames might differ but UIDs often stay consistent. I’ve used this trick when restoring backups to new servers where the account names had changed but the numeric IDs matched.
To check a user’s UID and GID, run:
id alex
You’ll see output like:
uid=1000(alex) gid=1000(alex) groups=1000(alex),27(sudo),998(docker)
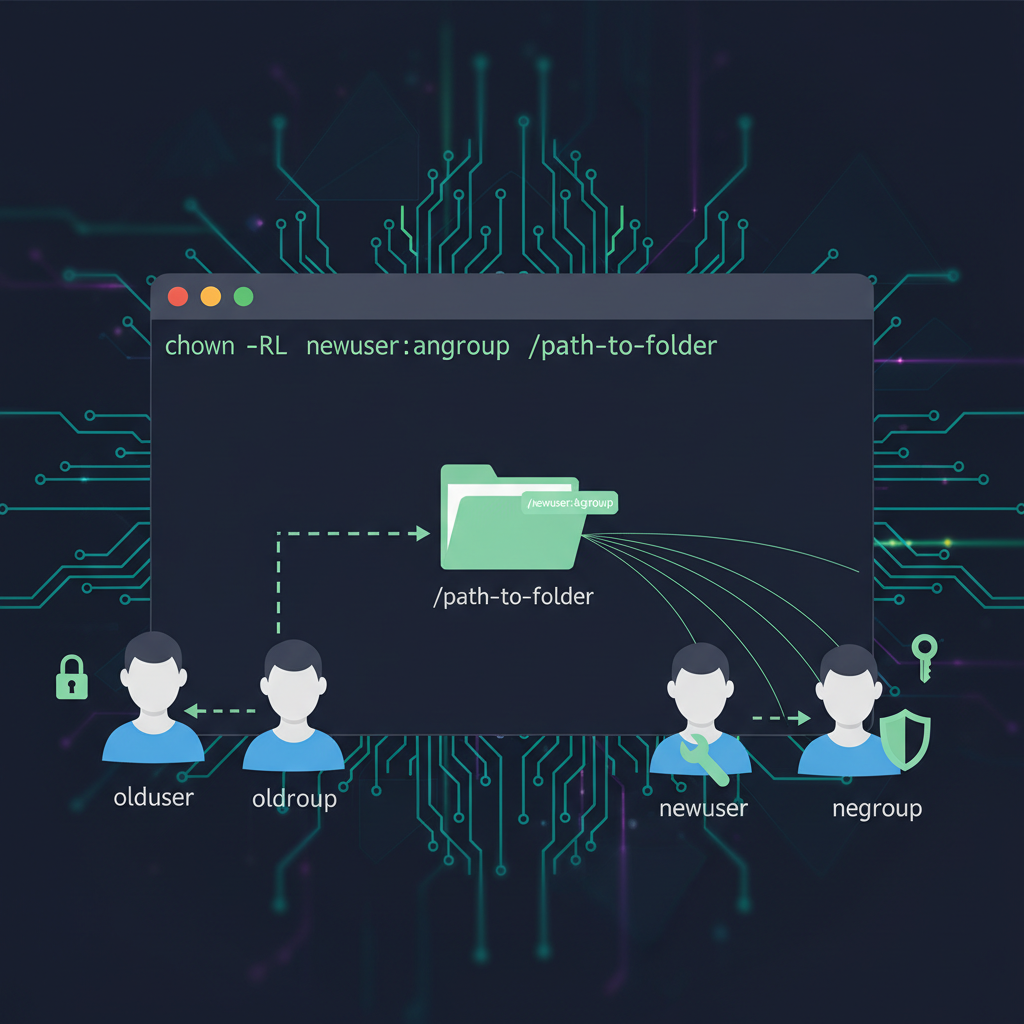
Recursive chown: Changing Ownership of Directories
Individual files are straightforward. Directories with hundreds or thousands of files require a different approach.
The -R (Recursive) Option
The -R flag makes chown process directories recursively:
sudo chown -R alex:developers /home/alex/projects
This changes ownership of the projects directory and every file and subdirectory inside it. It’s powerful and saves you from manually changing ownership on each file.
I use recursive chown constantly after using rsync for file transfers. Files transferred from another system retain their original ownership, which is usually wrong for the destination system. A quick recursive chown fixes everything at once.
Here’s a real scenario from last week: I copied a website from our staging server to production. All the files ended up owned by root because I ran rsync with sudo. The web server couldn’t write to its upload directory. One command fixed it:
sudo chown -R www-data:www-data /var/www/production-site
When to Use Recursive chown Carefully
Recursive operations are powerful. They’re also dangerous.
Never run recursive chown on system directories unless you absolutely know what you’re doing. I’ve seen people accidentally run:
sudo chown -R alex:alex /
This attempts to change ownership of every single file on the system. Your system becomes unusable. Essential services can’t start. You’re looking at a reinstall or hours of recovery work.
The --preserve-root option prevents this catastrophe:
sudo chown -R --preserve-root alex:alex /
This will refuse to operate on the root directory. Many modern distributions make this the default behavior, but it’s worth using explicitly for safety.
After any recursive ownership change, verify what happened:
ls -la /var/www/mysite
Scan through the output and confirm the ownership looks correct before moving on.
Essential chown Options Every Admin Should Know
Beyond the basic syntax, a few options make chown more useful and safer.
Verbose Output with -v
The -v flag shows you exactly what chown is doing:
sudo chown -v alex:developers *.txt
Output:
changed ownership of 'notes.txt' from root:root to alex:developers
changed ownership of 'todo.txt' from root:root to alex:developers
This feedback is valuable when you’re changing ownership on multiple files and want to confirm each change.
For quieter output that only shows actual changes, use -c:
sudo chown -c alex:developers *.txt
This only prints output when ownership actually changes. If a file already had the correct ownership, you won’t see it in the output.
Using –reference to Copy Ownership
Sometimes you want to match another file’s ownership without looking up the exact user and group:
sudo chown --reference=template.conf new_config.conf
This sets new_config.conf to have the same owner and group as template.conf. It’s a shortcut I use when adding new files to a directory where I want consistent ownership.
Preserve Root with –preserve-root
I mentioned this earlier, but it’s worth emphasizing:
sudo chown -R --preserve-root alex:alex /important/directory
This prevents accidentally operating on the root directory. If someone typos /important/directory as /, chown will refuse to run rather than destroying system ownership.
Think of it as a safety catch. It costs nothing to include and can save you from disaster.
Real-World Use Cases for chown
Let me share the scenarios where I actually use chown in production environments.
Setting up web server directories. Every time I deploy a new website, the files need proper ownership. For Apache or Nginx:
sudo chown -R www-data:www-data /var/www/mysite
sudo chmod -R 755 /var/www/mysite
The chown gives the web server ownership. The chmod sets appropriate permissions. Both commands work together to create a secure, functional setup.
Fixing ownership after rsync transfers. When you transfer files with rsync, they often keep their source system ownership. This breaks things on the destination. After running rsync, I immediately fix ownership:
sudo rsync -av source/ destination/
sudo chown -R alex:alex destination/
Configuring SSH key ownership. SSH is picky about file ownership. Your SSH key setup requires the .ssh directory and its contents to be owned by your user account:
sudo chown -R alex:alex ~/.ssh
sudo chmod 700 ~/.ssh
sudo chmod 600 ~/.ssh/id_rsa
If root owns your .ssh directory, SSH will refuse to use your keys. The security model requires that only you can access your private keys.
Managing log file ownership for services. When setting up custom systemd services, you need to ensure the service account can write to its log files:
sudo chown myservice:myservice /var/log/myservice.log
Without correct ownership, your service starts but can’t log anything. You won’t notice until you need those logs for troubleshooting.
Team collaboration with shared project directories. When multiple developers work on the same codebase, group ownership enables collaboration:
sudo chown -R :developers /opt/project
sudo chmod -R g+w /opt/project
Now everyone in the developers group can modify project files. You’ll often see this combined with setting the setgid bit, but that’s a topic for another article.
Common chown Errors and How to Fix Them
Even with experience, you’ll hit error messages. Here’s how to troubleshoot them.
Operation Not Permitted
The most common error:
chown: changing ownership of 'file.txt': Operation not permitted
This means you don’t have permission to change ownership. The fix is simple – use sudo:
sudo chown alex:developers file.txt
Only root can change file ownership. Even if you own the file, you can’t transfer ownership to another user without elevated privileges.
There’s one exception: you can change a file’s group to any group you belong to without sudo. This works:
chown :developers myfile.txt
But only if you’re already a member of the developers group.
Invalid User or Group
chown: invalid user: 'nonexistent:badgroup'
This error means the user or group doesn’t exist on your system. Before running chown, verify the account exists.
Check if a user exists:
id alex
Check if a group exists:
getent group developers
The id command shows user information including all group memberships. If the user doesn’t exist, you’ll need to create the account first.
Sometimes you’ll encounter this with files transferred from other systems. The original system had a user account that doesn’t exist on your system. Use numeric UIDs to work around this:
sudo chown 1000:1000 transferred_file
Or create the matching user account on your system.
Another gotcha: filesystem limitations. If you’ve mounted a filesystem with the nosuid option, ownership changes might fail. Check your mount options with:
mount | grep nosuid
chown vs chmod vs umask: When to Use Each
These three commands form a complete system for controlling file access. Understanding how they relate prevents confusion.
chown controls WHO owns files. It sets the user and group ownership. This is the first layer of the permissions system – determining which ownership category applies when someone accesses a file.
chmod controls WHAT owners can do. The chmod command sets the read, write, and execute permissions for the owner, group, and others. Even if you own a file, you might not have write permission if chmod has restricted it.
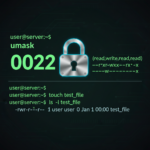
umask sets DEFAULT permissions for new files. The umask command controls what permissions are applied when creating new files. It’s a policy that applies before any file exists.
Here’s how they work together in practice. When I set up a new web application:
# Set ownership so the web server can access files
sudo chown -R www-data:www-data /var/www/myapp

# Set permissions - directories executable, files readable
sudo find /var/www/myapp -type d -exec chmod 755 {} \;
sudo find /var/www/myapp -type f -exec chmod 644 {} \;

# Set upload directory writable
sudo chmod 775 /var/www/myapp/uploads
Notice how I used the find command to apply chmod selectively. This is more precise than a blanket recursive chmod.
All three commands serve different purposes. You need chown to establish ownership, chmod to set specific permissions, and umask to control defaults for new files.
Security Best Practices When Using chown
File ownership is fundamental to Linux security. Here’s how to use chown safely.
Never recursively chown system directories. Directories like /etc, /var, and /usr have carefully configured ownership. Changing it breaks your system. Only use recursive chown on directories you created or explicitly manage.
Verify user and group exist before changing ownership. Use the id command to confirm accounts exist. Changing ownership to nonexistent accounts doesn’t provide security – it just creates confusion when you review permissions later.
Combine chown with chmod for proper security. Ownership alone doesn’t secure files. You need both correct ownership and appropriate permissions. After changing ownership, always review and set permissions appropriately.
Document ownership changes in team environments. When you change ownership on shared systems, document what you did and why. Leave a note in your team chat or ticketing system. Six months later, someone will wonder why that directory has unusual ownership. Save them the investigation.
Use –preserve-root for safety. Include this flag on recursive operations as a safety catch against typos:
sudo chown -R --preserve-root alex:alex /path/to/directory
Check process ownership with ps. Understanding which user runs which process helps you set correct file ownership. Use the ps command to see process owners:
ps aux | grep nginx
This shows you that nginx runs as www-data, so you know files it accesses should be owned by or accessible to that user.
Review logs after ownership changes. After changing ownership on service files, check system logs with journalctl to verify services still start properly. Permission and ownership problems often manifest as service startup failures.
Final Thoughts on Mastering File Ownership
The chown command is straightforward in concept but powerful in practice. You’re changing who owns files – that’s all it does. But that simple action controls access, enables collaboration, and maintains security.
Start with the basics: chown user:group file. Use -R for directories. Add -v when you want feedback. Include --preserve-root for safety.
Most importantly, remember that ownership and permissions work together. After changing ownership with chown, verify permissions with ls -la and adjust them with chmod if needed. The combination of correct ownership and appropriate permissions creates secure, functional systems.
Over the years, I’ve probably run chown thousands of times. It’s one of those fundamental tools you use constantly without thinking about it. But when you need it, you really need it – and now you know exactly how to use it effectively.